
ScrollView|使用 defaultScrollAnchor 设置滚动初始位置
了解如何实现默认从底部开始显示 ScrollView 视图,并在内容发生改变时滚动到指定位置。


在之前的这篇文章中,我们讨论了如何自定义 ScrollView 滚动时的对齐行为:

这篇文章,我们将探讨如何实现从底部开始显示 ScrollView。
使用 ScrollViewReader 实现( iOS 16 及以下)
在 iOS17 以前的版本中,一种常见的实现方式是使用 ScrollViewReader 搭配 scrollTo 滚动到底部:
struct ChatList: View {
    private var records: [Record]

    var body: some View {
        ScrollViewReader { proxy in
            ScrollView(.vertical) {
                VStack(spacing: 0) {
                    ForEach(records) { record in
                        RecordRowCardView(record: record)
                            .id("record-\(record.id)")
                    }
                }
                .padding(.horizontal)
            }
            .onAppear {
                if let lastRecord = records.last {
                    proxy.scrollTo(lastRecord.id, anchor: .bottom)
                }
            }
        }
    }
}在上述代码中,我们通过获取最后一条 records.last.id 来实现滚动到底部。
另一种更简单的方式,你可以在 ForEach 底部添加一个空的 Text 组件,并直接滚动到该组件的位置,可以实现一样的效果:
struct ChatList: View {
    private var records: [Record]

    var body: some View {
        ScrollViewReader { proxy in
            ScrollView(.vertical) {
                VStack(spacing: 0) {
                    ForEach(records) { record in
                        RecordRowCardView(record: record)
                            .id("record-\(record.id)")
                    }

                    // 空组件
                    Text("").id("bottomID")
                }
                .padding(.horizontal)
            }
            .onAppear {
                    proxy.scrollTo("bottomID", anchor: .bottom)
            }
        }
    }
}使用 defaultScrollAnchor 修饰器( iOS 17 及以上)
defaultScrollAnchor用于设置 ScrollView 或 List 组件的初始位置。
设置默认底部开始显示
通过设置 .defaultScrollAnchor(.bottom),ScrollView 默认可从底部开始显示,这对于 LazyVStack 这类懒加载组件仍然有效:
struct ChatList: View {
    private var records: [Record]

    var body: some View {
        ScrollView(.vertical) {
            LazyVStack(spacing: 0) {
                ForEach(records) { record in
                    // 省略
                }
            }
            .padding(.horizontal)
        }
        .defaultScrollAnchor(.bottom)
    }
}
defaultScrollAnchor 默认无滚动动画
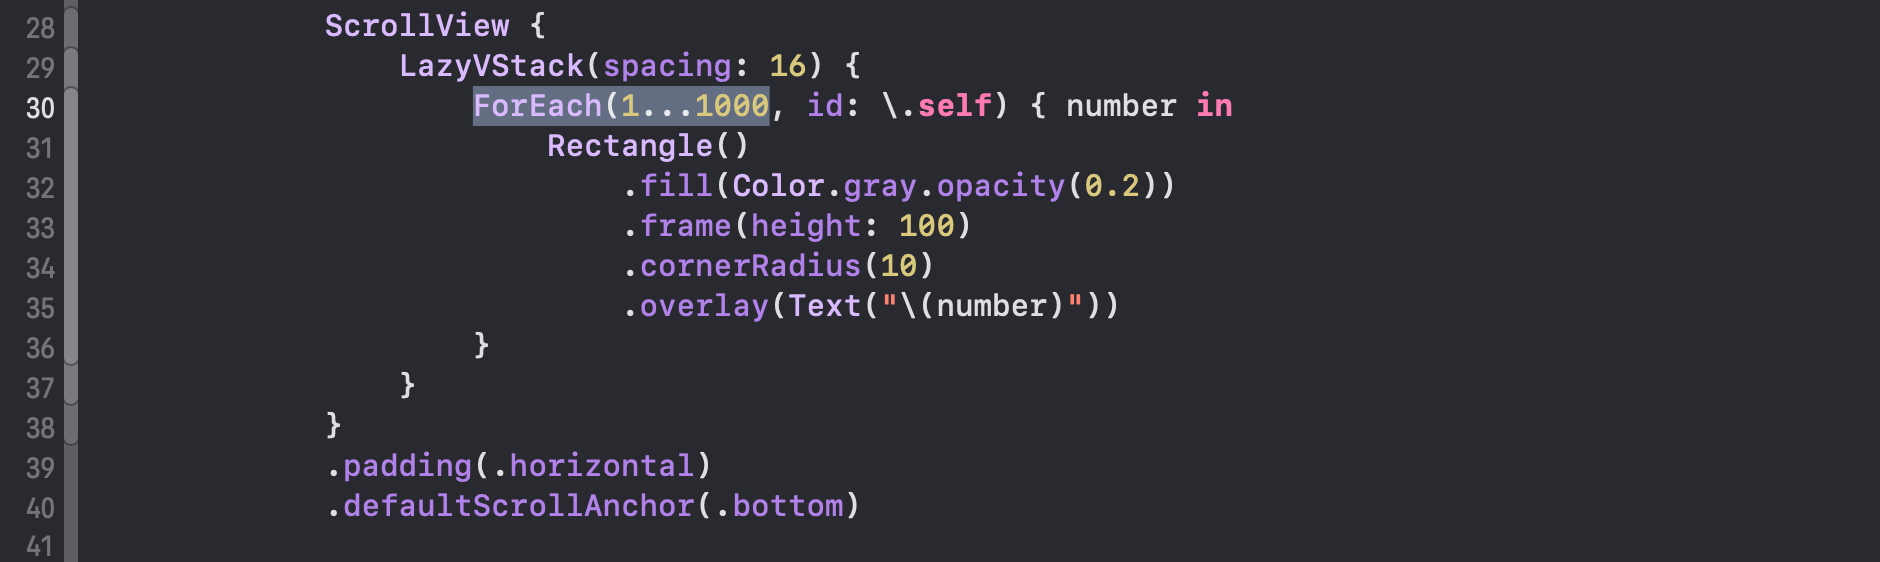
在下面这个代码中,显示 1000 个占位符:
可以看到没有滚动动画,页面初始化时即在最底部:
在 MONO 记账中,初始化时,之所以会有滚动动画,是因为在 App 中更新 appState.chatViewRecordIDs 时,我是用了 withAnimation 包装:

是否需要使用 scrollTargetLayout ?
经过在 iOS 17 以及 iOS 18 上测试,如果只需设置初始位置,则无需使用 .scrollTargetLayout 修饰器。
问题一:defaultScrollAnchor 导致的卡顿及内存占用问题
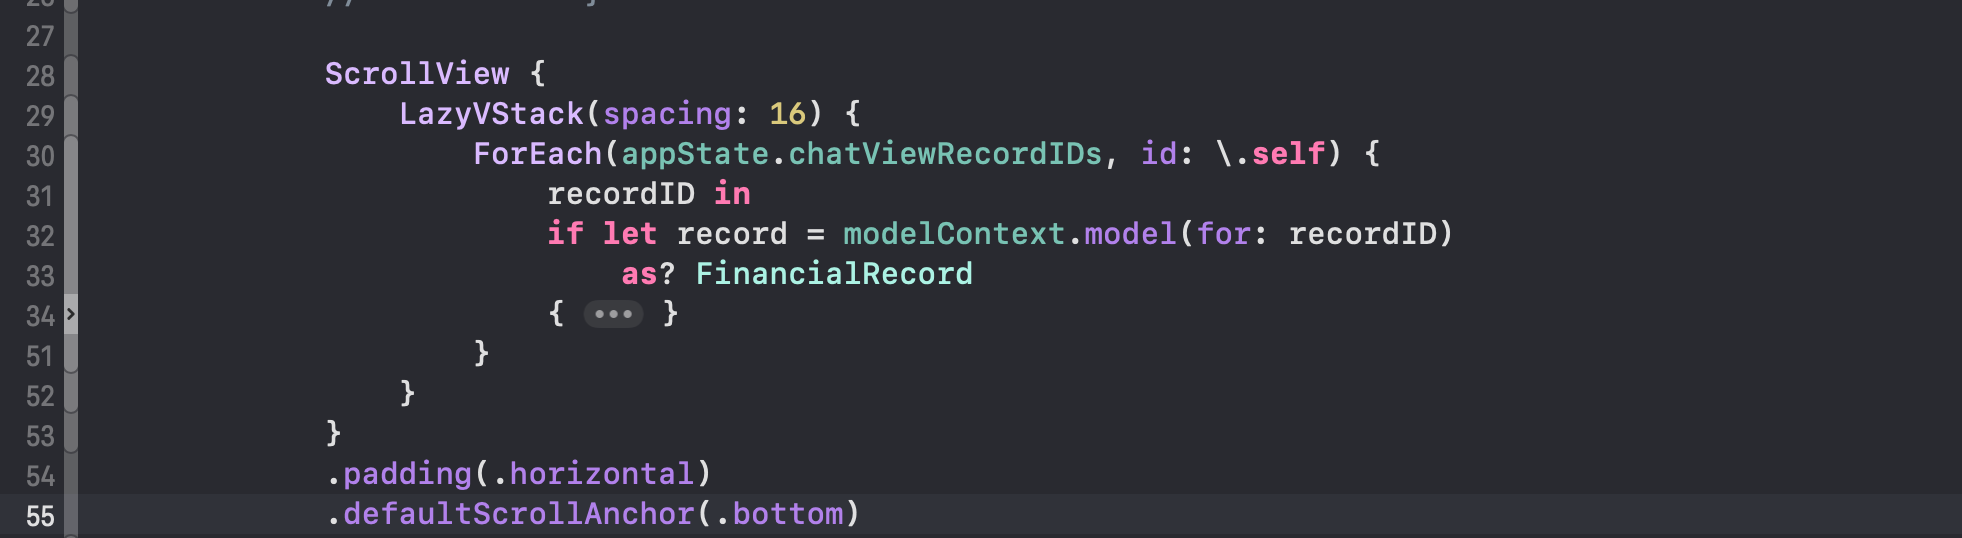
下面这个代码,在应用启动时会导致约 500ms 的挂起(和数量有关):
在物理机上能看到延迟数据,录屏无法看到。挂起约为 500ms。
- 在删除
defaultScrollAnchor之后,挂起问题消失。 - 删除
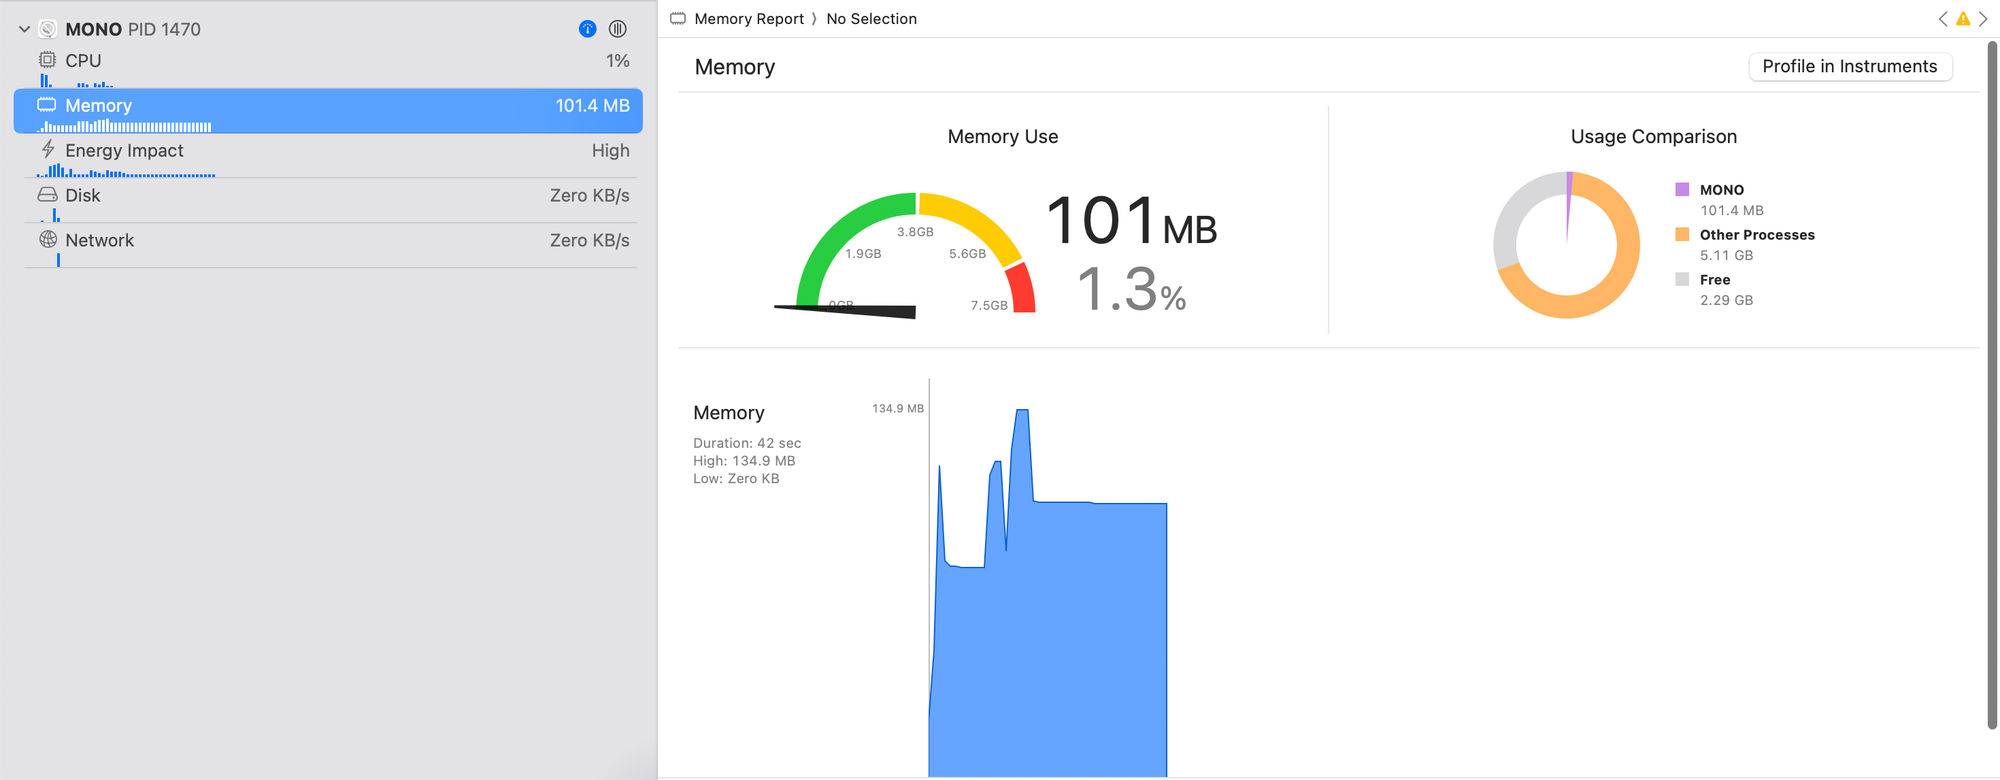
defaultScrollAnchor之后,内存占用 41MB - 保留
defaultScrollAnchor,内存占用 102MB
猜测可能是 defaultScrollAnchor 滚动过程中,触发一些格外 Lazy 对象的渲染。
是否和 SwiftData 对象有关系?
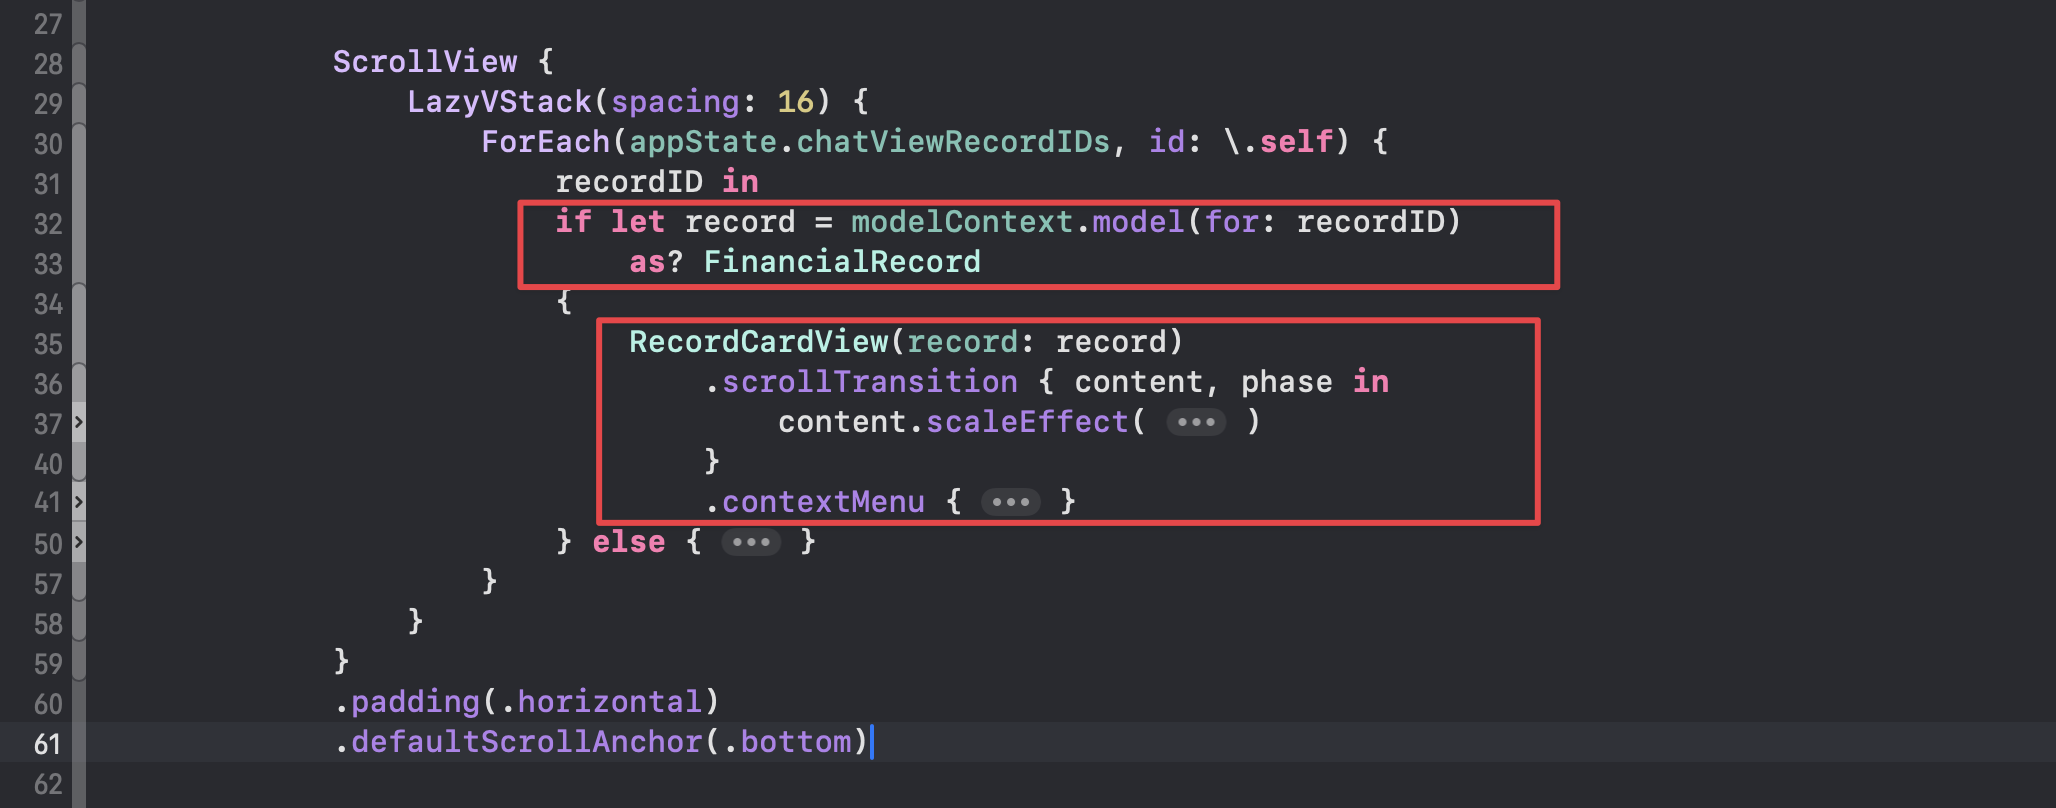
在原代码中,我使用 modelContext.model() 获取 SwiftData 模型对象数据,然后使用 RecordCardView 组件显示:
所以,挂起是否和以上操作有关系呢?我尝试删除以上代码,替换为一个 Rectangle 占位符来测试:
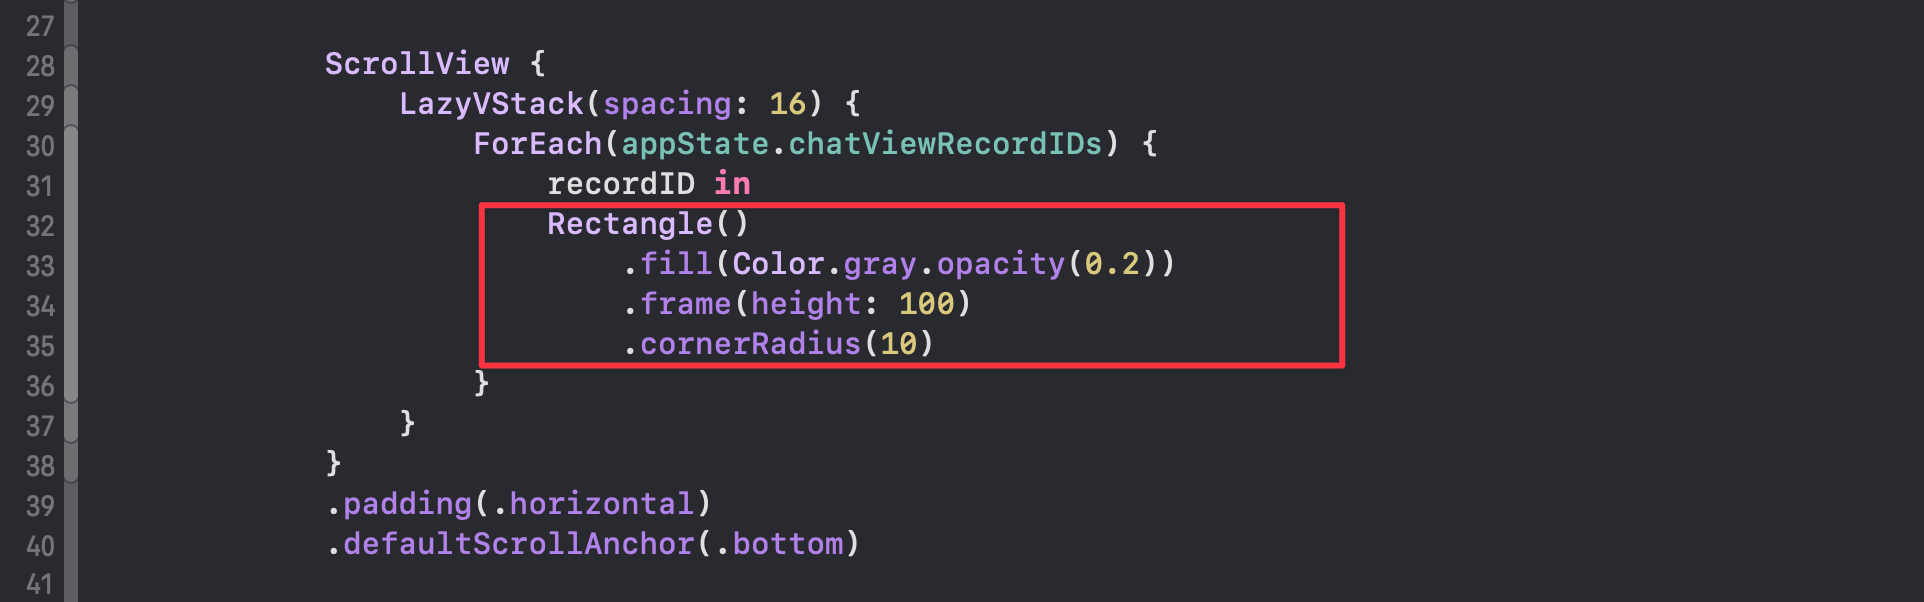
测试结果显示:挂起仍然存在,但减少到约 280ms。
进一步测试,使用 ForEach 直接显示 1000 个占位符,结果没有任何延迟,也没有滚动动画。
因此,推测和 appState.chatViewRecordIDs 有关系。

无任何延迟,无滚动动画。
appState.chatViewRecordIDs 默认值是一个空数组,会在 App 启动时,通过异步方法在后台初始化它,并且使用了 withAnimation 来添加动画:

正式由于在进入该页面之后,appState.chatViewRecordIDs 的更新导致滚动时的挂起问题。
最后通过为 App 初始化添加启动页面解决了该问题: